
rebel xt manual
Canon EOS Rebel XT (350D) Manual: A Comprehensive Guide
Discover a detailed resource for your Canon EOS Rebel XT (350D)! This guide‚ sourced from online manuals and user discussions‚
offers insights into setup‚ controls‚ and features. Explore PDF downloads‚
single-page JP2 files‚ and even torrent options for comprehensive learning.
Access instructions for EOS Utility‚ understand file formats like JPEG and RAW‚ and troubleshoot common issues.
Learn about lens compatibility and maintenance‚ alongside advanced custom functions. This manual empowers both novice and enthusiast photographers.
Welcome to the world of digital SLR photography with the Canon EOS Rebel XT (also known as the 350D)! Released as a significant step in accessible DSLR technology‚ the Rebel XT aimed to bridge the gap between point-and-shoot simplicity and the advanced control desired by photography enthusiasts. This camera‚ as noted in online resources‚ presented challenges in balancing ease of use for beginners with the features needed by experienced photographers.
The Rebel XT‚ a successor to earlier Rebel models like the 500 (Rebel XS)‚ offered a compelling combination of image quality and affordability. It quickly became a popular choice for those stepping up from simpler cameras. Understanding its capabilities requires a comprehensive guide – a resource to navigate its controls‚ shooting modes‚ and menu system effectively.
This introduction sets the stage for a detailed exploration of the Rebel XT. We’ll delve into its core functionalities‚ from initial setup to advanced customization. Whether you’re a first-time DSLR user or looking to rediscover this classic camera‚ this manual will provide the knowledge to unlock its full potential and capture stunning images.
Unboxing and Initial Setup
Upon receiving your Canon EOS Rebel XT‚ carefully unpack the box. You should find the camera body‚ a kit lens (typically an 18-55mm)‚ a battery‚ a battery charger‚ a neck strap‚ various cables (USB‚ AV)‚ and essential documentation‚ including a basic instruction manual. Before proceeding‚ inspect all components for any damage incurred during shipping.
The first step is charging the battery. Insert it into the provided charger and connect it to a power outlet. Allow the battery to charge fully – the indicator light will typically change color when complete. While charging‚ familiarize yourself with the camera’s exterior‚ identifying key buttons and dials.
Next‚ insert the charged battery into the camera’s battery compartment. Insert a compatible memory card (CompactFlash) into the designated slot. Power on the camera and follow the on-screen prompts to set the initial settings‚ including language‚ date‚ and time. Ensure the date and time are accurate for proper image metadata. This initial setup is crucial for a smooth photographic experience.
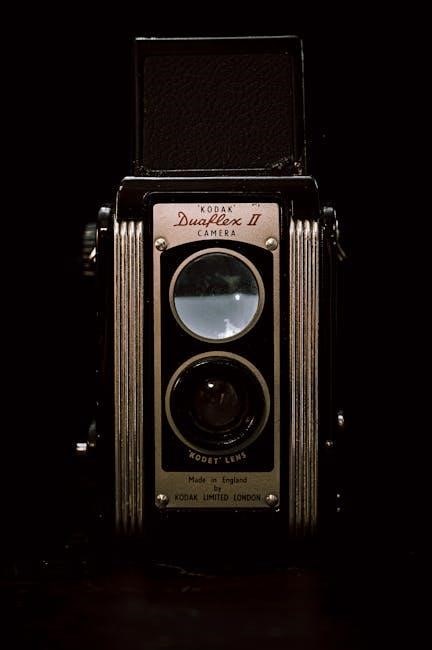
Understanding the Camera Body and Controls
The Canon EOS Rebel XT features a well-organized layout designed for accessibility. Key controls include the power switch‚ shutter button‚ main dial (for shooting modes)‚ and a cross-key controller for navigating menus and settings. The rear panel houses the LCD screen for image review and menu navigation.
The mode dial allows selection between Auto‚ Program (P)‚ Aperture Priority (Av)‚ Shutter Priority (Tv)‚ Manual (M)‚ and various scene modes. Understanding these modes is fundamental to controlling your images. The cross-key controller provides access to functions like ISO‚ white balance‚ and picture style settings.
Located on the top of the camera‚ the exposure compensation dial adjusts brightness in semi-automatic modes. The viewfinder offers a clear view of the scene‚ displaying shooting information. Familiarize yourself with the function of each button and dial through practical use. The camera’s ergonomic design aims for comfortable handling during extended shooting sessions.
The Rebel XT Sensor and Image Quality

The Canon EOS Rebel XT boasts an 8.0-megapixel APS-C CMOS sensor‚ delivering detailed images suitable for various applications. This sensor size provides a balance between image quality and camera body size‚ making it a popular choice for enthusiasts. The sensor’s performance is crucial for capturing accurate colors and dynamic range.
Image quality is influenced by factors like ISO setting‚ aperture‚ and shutter speed. Lower ISO values (100-400) produce cleaner images with minimal noise‚ ideal for well-lit conditions. Higher ISO settings (800 and above) introduce more noise but allow shooting in low light. Understanding the relationship between these settings is key to optimizing image quality.
The Rebel XT supports both JPEG and RAW file formats. JPEG offers convenience with smaller file sizes‚ while RAW provides greater flexibility for post-processing adjustments. Utilizing picture styles allows customization of color and contrast to achieve desired aesthetic results. Proper lens selection also significantly impacts overall image sharpness and clarity.
Shooting Modes: Auto‚ Program‚ Aperture Priority‚ Shutter Priority‚ Manual
The Canon EOS Rebel XT offers a versatile range of shooting modes to accommodate different skill levels and photographic scenarios. Auto mode simplifies operation‚ letting the camera handle all settings for point-and-shoot convenience. Program mode (P) allows some user control over ISO‚ white balance‚ and picture style‚ while the camera manages aperture and shutter speed.
Aperture Priority (Av) mode grants control over the lens aperture‚ influencing depth of field and background blur. Shutter Priority (Tv) mode lets you set the shutter speed‚ freezing motion or creating motion blur. These semi-automatic modes provide creative flexibility.
Manual (M) mode offers complete control over both aperture and shutter speed‚ enabling precise exposure adjustments. Mastering manual mode is essential for advanced photographers. Understanding how each mode impacts image results is crucial for achieving desired photographic outcomes. Experimentation with these modes unlocks the Rebel XT’s full potential.
Understanding the Rebel XT’s Autofocus System
The Canon EOS Rebel XT utilizes a 9-point autofocus (AF) system‚ providing a range of options for achieving sharp focus. These nine AF points are strategically positioned across the viewfinder‚ allowing you to select the point that best corresponds to your subject. AF modes include One-Shot for stationary subjects‚ and AI Servo for tracking moving subjects.
One-Shot AF locks focus when the shutter button is half-pressed‚ ideal for portraits and landscapes. AI Servo AF continuously adjusts focus as the subject moves‚ perfect for sports and wildlife photography. You can also select the AF point selection method: automatic‚ manual single-point‚ or manual zone selection.
Understanding these settings is key to capturing clear‚ in-focus images. Proper AF point selection and mode choice significantly impact image quality. Experimenting with different combinations will help you master the Rebel XT’s autofocus capabilities and consistently achieve sharp results.
Navigating the Menu System
The Canon EOS Rebel XT’s menu system‚ accessed via the ‘MENU’ button‚ is organized into several tabs‚ each dedicated to specific camera settings. These tabs include Shooting‚ AF‚ Quality‚ Picture Style‚ Custom Functions‚ and Setup. Navigating is done using the directional buttons on the rear of the camera‚ with the ‘SET’ button used to confirm selections.
The Shooting menu controls image capture settings like shooting mode‚ white balance‚ and ISO. The AF menu manages autofocus settings‚ including AF mode and AF point selection. The Quality menu allows you to choose image resolution and file format (JPEG or RAW).
Familiarizing yourself with the menu structure is crucial for customizing the camera to your preferences. The manual‚ and online resources‚ provide detailed explanations of each setting. Don’t hesitate to explore and experiment to unlock the full potential of your Rebel XT. Careful menu navigation ensures optimal image capture.
Customizing Camera Settings
The Canon EOS Rebel XT offers extensive customization options through its menu system and Custom Functions. Personalizing settings allows you to tailor the camera to your shooting style and preferences. Key areas for customization include autofocus behavior‚ image quality settings‚ and button assignments.
Within the Custom Functions menu‚ you can modify various camera operations. For example‚ you can adjust the shutter button half-press function‚ customize the AF point selection method‚ and change the behavior of the ‘SET’ button. Experimenting with these settings can significantly improve your workflow.
Furthermore‚ Picture Styles allow you to fine-tune the look of your images directly within the camera. Adjusting sharpness‚ contrast‚ saturation‚ and color tone provides creative control over your photographs. Remember to consult the manual for detailed explanations of each customization option‚ maximizing your Rebel XT’s capabilities.
Working with Picture Styles

Canon’s Picture Styles are a powerful feature on the Rebel XT‚ allowing you to customize the look of your images directly in-camera‚ before you even transfer them to a computer. These presets – Standard‚ Portrait‚ Landscape‚ Neutral‚ Faithful‚ and Monochrome – offer different starting points for color and contrast.
Each Picture Style can be further customized to your exact preferences. You can adjust parameters like sharpness‚ contrast‚ color saturation‚ and color tone. This level of control allows you to achieve a specific aesthetic without post-processing. For example‚ boosting contrast and saturation in the ‘Portrait’ style can create vibrant skin tones.
Experimenting with these settings is key to understanding how they affect your images. Consider creating and saving your own custom Picture Styles for frequently used shooting scenarios. This streamlines your workflow and ensures consistent results. Remember to review your images on the camera’s LCD to assess the impact of your adjustments.
Using the Built-in Flash
The Canon EOS Rebel XT’s built-in flash is a convenient tool for adding light to your photos‚ particularly in low-light situations. It operates in several modes‚ including Auto‚ Fill-in‚ Red-eye Reduction‚ and Manual. Auto mode lets the camera decide when to fire the flash‚ while Fill-in provides a gentle burst of light to brighten shadows in outdoor portraits.
Red-eye Reduction emits a series of pre-flashes to constrict pupils‚ minimizing the red-eye effect. Manual flash allows you to control the flash output level‚ offering greater creative control. Understanding flash exposure compensation is crucial for achieving balanced lighting. Increasing compensation boosts flash power‚ while decreasing it reduces it.
Be mindful of the flash’s limitations. Direct flash can create harsh shadows and washed-out colors. Consider using a diffuser or bouncing the flash off a ceiling or wall to soften the light. Experiment with different settings to find what works best for your subject and environment.
External Flash Compatibility and Control
The Canon EOS Rebel XT is compatible with a range of Canon Speedlite external flashes‚ offering significantly more power and control than the built-in flash. These flashes connect to the camera’s hot shoe and can be controlled through the camera’s menu system. Through-the-TTL (TTL) flash metering allows the camera to automatically calculate the correct flash exposure‚ ensuring properly lit images.
Manual flash control provides full creative freedom‚ letting you adjust flash power and settings independently. High-speed sync (HSS) enables flash synchronization with faster shutter speeds‚ useful for overpowering sunlight or creating motion blur. Second-curtain sync fires the flash at the end of the exposure‚ creating natural-looking motion trails.

Custom Functions allow you to personalize flash settings‚ such as flash exposure compensation and flash synchronization mode. Wireless flash capabilities enable you to trigger multiple flashes off-camera‚ creating more complex lighting setups. Exploring the features of compatible Speedlites unlocks a new level of photographic possibilities.
Understanding and Using Live View
The Canon EOS Rebel XT features Live View‚ a mode allowing you to compose and review images on the camera’s LCD screen as if looking through the viewfinder. Activating Live View is done via a dedicated button on the back of the camera‚ offering a real-time preview of your shot. This feature is particularly useful for precise composition‚ macro photography‚ and shooting in challenging angles.
Live View offers several focusing modes‚ including automatic and manual focus. The magnification function allows you to zoom in on the image for critical focus confirmation. Histogram display provides valuable exposure information‚ helping you avoid over or underexposed images. Face Detection technology automatically detects and focuses on faces within the frame.
However‚ be aware that using Live View can drain the battery faster than shooting through the viewfinder. Additionally‚ the camera may heat up during prolonged Live View use. Understanding these limitations allows you to maximize the benefits of this versatile feature.
Image Review and Playback Functions
The Canon EOS Rebel XT offers a comprehensive suite of image review and playback functions. After capturing an image‚ pressing the playback button allows you to view your photos directly on the LCD screen. You can navigate through images individually or utilize index displays to quickly scan thumbnails. Zooming functionality enables detailed inspection of image sharpness and composition.
The camera provides histogram displays for assessing exposure accuracy‚ highlighting potential clipping in shadows or highlights. Playback also includes options for rotating images‚ protecting them from accidental deletion‚ and deleting unwanted photos. The Jump function allows quick navigation to specific dates or groups of images.
Furthermore‚ the Rebel XT supports slideshow playback with customizable intervals and transition effects. You can also rate images for easier organization and filtering. These playback features are essential for evaluating your shots and refining your photographic skills‚ ensuring you capture the best possible images.
Transferring Images to a Computer (EOS Utility)
The Canon EOS Utility software is the primary method for transferring images from your Rebel XT to a computer. This software‚ available for both Windows and macOS‚ facilitates a seamless transfer process and offers additional functionalities. First‚ connect your camera to your computer using the provided USB cable. Ensure the camera is powered on.
Launch EOS Utility on your computer; it should automatically detect your Rebel XT. You’ll then be presented with options for image transfer‚ including selecting specific images or transferring all photos on the memory card. EOS Utility also allows for remote camera control‚ enabling you to adjust settings and even trigger the shutter from your computer.
Beyond simple file transfer‚ the utility assists with image organization and can be used to update the camera’s firmware. It supports both JPEG and RAW file formats‚ ensuring compatibility with various editing software. Downloading the latest version of EOS Utility from Canon’s website is recommended for optimal performance and feature access.
Understanding the Rebel XT’s File Formats (JPEG‚ RAW)
The Canon EOS Rebel XT offers two primary file formats: JPEG and RAW. JPEG (Joint Photographic Expert Group) is a compressed file format‚ resulting in smaller file sizes and convenient sharing. However‚ this compression comes at the cost of some image data‚ limiting editing flexibility. JPEGs are ready to use straight from the camera‚ ideal for immediate viewing and printing.
RAW files‚ conversely‚ contain all the unprocessed data captured by the camera’s sensor. This provides maximum editing latitude‚ allowing for adjustments to white balance‚ exposure‚ and other parameters without significant quality loss. RAW files are significantly larger than JPEGs and require post-processing using software like Canon’s Digital Photo Professional or Adobe Lightroom.
Choosing between the two depends on your workflow. For casual shooting and quick results‚ JPEG is sufficient. If you prioritize image quality and extensive editing control‚ RAW is the preferred choice. The Rebel XT allows you to record images in both formats simultaneously‚ offering the best of both worlds.

Basic Troubleshooting and Common Issues
Encountering issues with your Canon EOS Rebel XT is common‚ but many are easily resolved. A frequent problem is the “Error 90” message‚ often indicating a shutter mechanism issue requiring professional repair. Another common concern involves the LCD screen displaying nothing; check battery levels and ensure the camera isn’t in power-saving mode.
If autofocus isn’t functioning correctly‚ verify the lens is properly attached and the autofocus mode is appropriate for the subject. Memory card errors can occur; try a different card or format the existing one (after backing up data!). Slow performance might indicate a full buffer; allow the camera to write data to the card.

For general sluggishness‚ a reset to factory defaults (found in the menu) can often help. Always consult the full manual for detailed troubleshooting steps. Online forums and communities dedicated to the Rebel XT are valuable resources for finding solutions to less common problems and sharing experiences with other users;
Lens Compatibility and Choices
The Canon EOS Rebel XT utilizes the Canon EF/EF-S lens mount‚ offering a vast selection of compatible lenses. EF lenses are compatible with all Canon EOS cameras‚ while EF-S lenses are designed specifically for cameras with APS-C sensors like the Rebel XT‚ providing a cropped field of view.

Kit lenses‚ typically an 18-55mm‚ are a popular starting point‚ offering versatility for everyday photography. For portraiture‚ consider a 50mm f/1.8 lens‚ known for its affordability and excellent image quality. Wide-angle lenses (e.g.‚ 10-22mm) are ideal for landscapes and architecture‚ while telephoto lenses (e.g.‚ 70-300mm) excel at capturing distant subjects.
Third-party lens manufacturers like Sigma‚ Tamron‚ and Tokina also offer compatible lenses. When choosing a lens‚ consider factors like focal length‚ aperture‚ image stabilization‚ and budget. Ensure the lens is in good working condition and compatible with your shooting style for optimal results.
Cleaning and Maintaining Your Rebel XT
Regular cleaning is crucial for maintaining your Canon EOS Rebel XT’s performance and longevity. Always power off the camera before any cleaning procedure. To clean the exterior‚ use a soft‚ dry cloth to wipe away dust and fingerprints. Avoid using harsh chemicals or abrasive cleaners‚ as they can damage the finish.
The sensor should be cleaned periodically to remove dust particles. Use a dedicated sensor cleaning kit‚ following the instructions carefully. For the viewfinder‚ use a blower to remove dust‚ avoiding direct contact with the glass. Clean the lens with a lens cleaning cloth and solution‚ applying gentle circular motions.
Store your Rebel XT in a dry‚ dust-free environment when not in use. Protect it from extreme temperatures and humidity. Periodically check the battery compartment for corrosion and clean if necessary. Proper maintenance ensures your camera remains in optimal condition for years of reliable service.
Advanced Features: Custom Functions
The Canon EOS Rebel XT offers a range of custom functions to tailor the camera to your shooting style. These functions‚ accessible through the menu system‚ allow you to personalize button assignments and camera behavior. Explore options to modify the shutter button’s half-press action‚ adjust autofocus settings‚ and customize the Quick Control screen.
You can assign specific functions to the AE Lock/AF Lock button‚ providing quick access to frequently used settings. Customize the viewfinder display to show only the information you need‚ reducing clutter. Adjust the image quality settings to prioritize speed or detail‚ depending on your preferences.

Experiment with the custom white balance settings to achieve accurate color rendition in challenging lighting conditions. Utilize the custom picture style editor to fine-tune the look of your images. Mastering these custom functions unlocks the full potential of your Rebel XT‚ enabling you to capture images precisely as you envision them.
Resources and Further Learning
Beyond this manual‚ a wealth of resources exists to deepen your understanding of the Canon EOS Rebel XT. Online forums and communities dedicated to Canon photography offer valuable tips‚ troubleshooting advice‚ and shared experiences from fellow users. Explore websites like The Manual Library for downloadable manuals and supplementary materials.
Consider investing in photography courses or workshops to enhance your skills and learn advanced techniques. YouTube channels provide tutorials on everything from basic camera operation to post-processing workflows. Don’t overlook Canon’s official website‚ which often features updated firmware and support documentation.
Numerous books are available covering digital SLR photography‚ specifically addressing Canon cameras. Practice consistently‚ experimenting with different settings and compositions to develop your photographic eye. Remember‚ continuous learning is key to unlocking your creative potential and mastering the art of photography with your Rebel XT.